
搜索到
4
篇与
Spring Boot
的结果
-
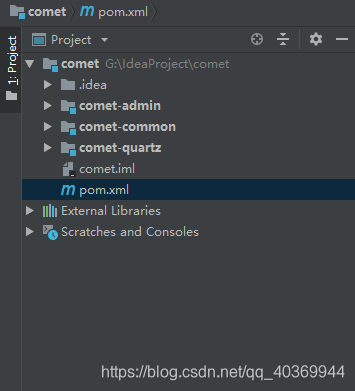
 IDEA SpringBoot多模块开发 测试项目整体结构:1.创建父项目(测试)使用IDEA创建springboot父项目下一步:2.创建公共子模块(测试)项目右键2.1修改该子项目comet-common的pom.xml其中依赖根据自己需求添加<?xml version="1.0" encoding="UTF-8"?><project xmlns="http://maven.apache.org/POM/4.0.0" xmlns:xsi="http://www.w3.org/2001/XMLSchema-instance" xsi:schemaLocation="http://maven.apache.org/POM/4.0.0 http://maven.apache.org/xsd/maven-4.0.0.xsd"> <parent> <artifactId>comet</artifactId> <groupId>com.comet</groupId> <version>1.0.0</version> </parent> <modelVersion>4.0.0</modelVersion> <artifactId>comet-common</artifactId> <description> common通用工具 </description> <dependencies> <!-- Spring框架基本的核心工具 --> <dependency> <groupId>org.springframework</groupId> <artifactId>spring-context-support</artifactId> </dependency> <!-- SpringWeb模块 --> <dependency> <groupId>org.springframework</groupId> <artifactId>spring-web</artifactId> </dependency> <!--Shiro核心框架 --> <dependency> <groupId>org.apache.shiro</groupId> <artifactId>shiro-core</artifactId> </dependency> <!-- pagehelper 分页插件 --> <dependency> <groupId>com.github.pagehelper</groupId> <artifactId>pagehelper-spring-boot-starter</artifactId> </dependency> <!-- 自定义验证注解 --> <dependency> <groupId>javax.validation</groupId> <artifactId>validation-api</artifactId> </dependency> <!--常用工具类 --> <dependency> <groupId>org.apache.commons</groupId> <artifactId>commons-lang3</artifactId> </dependency> <!-- JSON工具类 --> <dependency> <groupId>com.fasterxml.jackson.core</groupId> <artifactId>jackson-databind</artifactId> </dependency> <!-- 阿里JSON解析器 --> <dependency> <groupId>com.alibaba</groupId> <artifactId>fastjson</artifactId> </dependency> <!-- io常用工具类 --> <dependency> <groupId>commons-io</groupId> <artifactId>commons-io</artifactId> </dependency> <!-- 文件上传工具类 --> <dependency> <groupId>commons-fileupload</groupId> <artifactId>commons-fileupload</artifactId> </dependency> <!-- HTML解析器 --> <dependency> <groupId>org.jsoup</groupId> <artifactId>jsoup</artifactId> </dependency> <!-- excel工具 --> <dependency> <groupId>org.apache.poi</groupId> <artifactId>poi-ooxml</artifactId> </dependency> <!-- yml解析器 --> <dependency> <groupId>org.yaml</groupId> <artifactId>snakeyaml</artifactId> </dependency> <!-- servlet包 --> <dependency> <groupId>javax.servlet</groupId> <artifactId>javax.servlet-api</artifactId> </dependency> </dependencies></project> 整体目录结构及测试类:2.2修改父项目pom.xml其中依赖根据自己需求添加<?xml version="1.0" encoding="UTF-8"?><project xmlns="http://maven.apache.org/POM/4.0.0" xmlns:xsi="http://www.w3.org/2001/XMLSchema-instance" xsi:schemaLocation="http://maven.apache.org/POM/4.0.0 https://maven.apache.org/xsd/maven-4.0.0.xsd"> <modelVersion>4.0.0</modelVersion> <groupId>com.comet</groupId> <artifactId>comet</artifactId> <packaging>pom</packaging> <version>1.0.0</version> <modules> <module>comet-common</module> </modules> <name>comet</name> <description>彗星管理系统</description> <properties> <comet.version>1.0.0</comet.version> <project.build.sourceEncoding>UTF-8</project.build.sourceEncoding> <project.reporting.outputEncoding>UTF-8</project.reporting.outputEncoding> <java.version>1.8</java.version> <shiro.version>1.4.1</shiro.version> <thymeleaf.extras.shiro.version>2.0.0</thymeleaf.extras.shiro.version> <mybatis.boot.version>1.3.2</mybatis.boot.version> <druid.version>1.1.14</druid.version> <bitwalker.version>1.19</bitwalker.version> <kaptcha.version>2.3.2</kaptcha.version> <swagger.version>2.9.2</swagger.version> <pagehelper.boot.version>1.2.5</pagehelper.boot.version> <fastjson.version>1.2.47</fastjson.version> <oshi.version>3.9.1</oshi.version> <commons.io.version>2.5</commons.io.version> <commons.fileupload.version>1.3.3</commons.fileupload.version> <jsoup.version>1.11.3</jsoup.version> <poi.version>3.17</poi.version> <velocity.version>1.7</velocity.version> </properties> <!-- 依赖声明 --> <dependencyManagement> <dependencies> <!-- 公共模块--> <dependency> <groupId>com.comet</groupId> <artifactId>comet-common</artifactId> <version>${comet.version}</version> </dependency> <!-- SpringBoot的依赖配置--> <dependency> <groupId>org.springframework.boot</groupId> <artifactId>spring-boot-dependencies</artifactId> <version>2.1.1.RELEASE</version> <type>pom</type> <scope>import</scope> </dependency> <!--阿里数据库连接池 --> <dependency> <groupId>com.alibaba</groupId> <artifactId>druid-spring-boot-starter</artifactId> <version>${druid.version}</version> </dependency> <!--验证码 --> <dependency> <groupId>com.github.penggle</groupId> <artifactId>kaptcha</artifactId> <version>${kaptcha.version}</version> </dependency> <!--Shiro核心框架 --> <dependency> <groupId>org.apache.shiro</groupId> <artifactId>shiro-core</artifactId> <version>${shiro.version}</version> </dependency> <!-- Shiro使用Srping框架 --> <dependency> <groupId>org.apache.shiro</groupId> <artifactId>shiro-spring</artifactId> <version>${shiro.version}</version> </dependency> <!-- Shiro使用EhCache缓存框架 --> <dependency> <groupId>org.apache.shiro</groupId> <artifactId>shiro-ehcache</artifactId> <version>${shiro.version}</version> </dependency> <!-- thymeleaf模板引擎和shiro框架的整合 --> <dependency> <groupId>com.github.theborakompanioni</groupId> <artifactId>thymeleaf-extras-shiro</artifactId> <version>${thymeleaf.extras.shiro.version}</version> </dependency> <!-- 解析客户端操作系统、浏览器等 --> <dependency> <groupId>eu.bitwalker</groupId> <artifactId>UserAgentUtils</artifactId> <version>${bitwalker.version}</version> </dependency> <!-- pagehelper 分页插件 --> <dependency> <groupId>com.github.pagehelper</groupId> <artifactId>pagehelper-spring-boot-starter</artifactId> <version>${pagehelper.boot.version}</version> </dependency> <!-- 获取系统信息 --> <dependency> <groupId>com.github.oshi</groupId> <artifactId>oshi-core</artifactId> <version>${oshi.version}</version> </dependency> <!-- swagger2--> <dependency> <groupId>io.springfox</groupId> <artifactId>springfox-swagger2</artifactId> <version>${swagger.version}</version> <exclusions> <exclusion> <groupId>io.swagger</groupId> <artifactId>swagger-annotations</artifactId> </exclusion> <exclusion> <groupId>io.swagger</groupId> <artifactId>swagger-models</artifactId> </exclusion> </exclusions> </dependency> <!-- swagger2-UI--> <dependency> <groupId>io.springfox</groupId> <artifactId>springfox-swagger-ui</artifactId> <version>${swagger.version}</version> </dependency> <!--io常用工具类 --> <dependency> <groupId>commons-io</groupId> <artifactId>commons-io</artifactId> <version>${commons.io.version}</version> </dependency> <!--文件上传工具类 --> <dependency> <groupId>commons-fileupload</groupId> <artifactId>commons-fileupload</artifactId> <version>${commons.fileupload.version}</version> </dependency> <!-- HTML解析器 --> <dependency> <groupId>org.jsoup</groupId> <artifactId>jsoup</artifactId> <version>${jsoup.version}</version> </dependency> <!-- excel工具 --> <dependency> <groupId>org.apache.poi</groupId> <artifactId>poi-ooxml</artifactId> <version>${poi.version}</version> </dependency> <!--velocity代码生成使用模板 --> <dependency> <groupId>org.apache.velocity</groupId> <artifactId>velocity</artifactId> <version>${velocity.version}</version> </dependency> <!-- 阿里JSON解析器 --> <dependency> <groupId>com.alibaba</groupId> <artifactId>fastjson</artifactId> <version>${fastjson.version}</version> </dependency> </dependencies> </dependencyManagement> <build> <plugins> <plugin> <groupId>org.apache.maven.plugins</groupId> <artifactId>maven-compiler-plugin</artifactId> <configuration> <source>${java.version}</source> <target>${java.version}</target> <encoding>${project.build.sourceEncoding}</encoding> </configuration> </plugin> </plugins> </build></project> 3.创建定时任务子项目(测试)和创建公共模块同样步骤:3.1修改comet-quartz项目pom.xml<?xml version="1.0" encoding="UTF-8"?><project xmlns="http://maven.apache.org/POM/4.0.0" xmlns:xsi="http://www.w3.org/2001/XMLSchema-instance" xsi:schemaLocation="http://maven.apache.org/POM/4.0.0 https://maven.apache.org/xsd/maven-4.0.0.xsd"> <modelVersion>4.0.0</modelVersion> <parent> <groupId>com.comet</groupId> <artifactId>comet</artifactId> <version>1.0.0</version> <relativePath/> </parent> <artifactId>comet-quartz</artifactId> <description> quartz定时任务</description> <dependencies> <dependency> <groupId>com.comet</groupId> <artifactId>comet-common</artifactId> </dependency> </dependencies></project> 3.2修改父项目pom.xml做相应添加 整体结构及测试类: 4.创建启动项目步骤基本一致,注意以下几点:4.1修改启动项目的pom.xml<?xml version="1.0" encoding="UTF-8"?><project xmlns="http://maven.apache.org/POM/4.0.0" xmlns:xsi="http://www.w3.org/2001/XMLSchema-instance" xsi:schemaLocation="http://maven.apache.org/POM/4.0.0 https://maven.apache.org/xsd/maven-4.0.0.xsd"> <modelVersion>4.0.0</modelVersion> <parent> <groupId>com.comet</groupId> <artifactId>comet</artifactId> <version>1.0.0</version> <relativePath/> <!-- lookup parent from repository --> </parent> <artifactId>comet-admin</artifactId> <packaging>war</packaging> <description> web服务入口 </description> <properties> <java.version>1.8</java.version> </properties> <dependencies> <dependency> <groupId>org.springframework.boot</groupId> <artifactId>spring-boot-starter-web</artifactId> </dependency> <dependency> <groupId>org.springframework.boot</groupId> <artifactId>spring-boot-starter-tomcat</artifactId> <scope>provided</scope> </dependency> <dependency> <groupId>org.springframework.boot</groupId> <artifactId>spring-boot-starter-test</artifactId> <scope>test</scope> </dependency> <!--定时任务--> <dependency> <groupId>com.comet</groupId> <artifactId>comet-quartz</artifactId> <version>${comet.version}</version> </dependency> </dependencies> <build> <plugins> <plugin> <groupId>org.springframework.boot</groupId> <artifactId>spring-boot-maven-plugin</artifactId> <configuration> <fork>true</fork> <!-- 如果没有该配置,devtools不会生效 --> </configuration> <executions> <execution> <goals> <goal>repackage</goal> </goals> </execution> </executions> </plugin> </plugins> </build></project> 4.2修改父项目pom.xml做相应添加4.3修改父项目application.yml项目中application.yml只在启动项目存在# 项目相关配置 comet: # 名称 name: comet # 版本 version: 1.0.0 # 版权年份 copyrightYear: 2019 # 开发环境配置 server: # 服务器的HTTP端口,默认为80 port: 80 servlet: # 应用的访问路径 context-path: / tomcat: # tomcat的URI编码 uri-encoding: UTF-8 # tomcat最大线程数,默认为200 max-threads: 800 # Tomcat启动初始化的线程数,默认值25 min-spare-threads: 30 4.4启动项目整体结构图中标注为在启动类上取消数据源自动配置,避免启动时报错,因为没有配置数据源5.运行测试运行:comet-admin访问:http://127.0.0.1/结果:数据来源:.comet-commoncomet-quartz
 -
Spring Boot 整合Shiro(一)登录认证和授权(附源码) shiro Apache Shiro是一个强大且易用的Java安全框架,执行身份验证、授权、密码和会话管理。主要功能三个核心组件:Subject, SecurityManager 和 Realms.Subject:即“当前操作用户”。但是,在Shiro中,Subject这一概念并不仅仅指人,也可以是第三方进程、后台帐户(Daemon Account)或其他类似事物。它仅仅意味着“当前跟软件交互的东西”。 Subject代表了当前用户的安全操作,SecurityManager则管理所有用户的安全操作。 SecurityManager:它是Shiro框架的核心,典型的Facade模式,Shiro通过SecurityManager来管理内部组件实例,并通过它来提供安全管理的各种服务。 Realm: Realm充当了Shiro与应用安全数据间的“桥梁”或者“连接器”。也就是说,当对用户执行认证(登录)和授权(访问控制)验证时,Shiro会从应用配置的Realm中查找用户及其权限信息。 从这个意义上讲,Realm实质上是一个安全相关的DAO:它封装了数据源的连接细节,并在需要时将相关数据提供给Shiro。当配置Shiro时,你必须至少指定一个Realm,用于认证和(或)授权。配置多个Realm是可以的,但是至少需要一个。 Shiro内置了可以连接大量安全数据源(又名目录)的Realm,如LDAP、关系数据库(JDBC)、类似INI的文本配置资源以及属性文件等。如果缺省的Realm不能满足需求,你还可以插入代表自定义数据源的自己的Realm实现。 1.项目版本Spring Boot 2.x shiro 1.3.21.1导入依赖 <dependency> <groupId>org.apache.shiro</groupId> <artifactId>shiro-spring</artifactId> <version>1.3.2</version> </dependency>2.类配置2.1 ShiroConfig相当于之前的xml配置,包括:过滤的文件和权限,密码加密的算法,其用注解等相关功能。import com.shiro.realm.CustomRealm; import org.apache.shiro.mgt.SecurityManager; import org.apache.shiro.spring.LifecycleBeanPostProcessor; import org.apache.shiro.spring.security.interceptor.AuthorizationAttributeSourceAdvisor; import org.apache.shiro.spring.web.ShiroFilterFactoryBean; import org.apache.shiro.web.mgt.DefaultWebSecurityManager; import org.springframework.aop.framework.autoproxy.DefaultAdvisorAutoProxyCreator; import org.springframework.context.annotation.Bean; import org.springframework.context.annotation.Configuration; import org.springframework.context.annotation.DependsOn; import java.util.LinkedHashMap; import java.util.Map; /** * 过滤的文件和权限,密码加密的算法,其用注解等相关功能 */ @Configuration public class ShiroConfig { @Bean(name = "shiroFilter") public ShiroFilterFactoryBean shiroFilter(SecurityManager securityManager) { ShiroFilterFactoryBean shiroFilterFactoryBean = new ShiroFilterFactoryBean(); // Shiro的核心安全接口,这个属性是必须的 shiroFilterFactoryBean.setSecurityManager(securityManager); // 身份认证失败,则跳转到登录页面的配置 shiroFilterFactoryBean.setLoginUrl("/login"); // 权限认证失败,则跳转到指定页面 shiroFilterFactoryBean.setUnauthorizedUrl("/notRole"); Map<String, String> filterChainDefinitionMap = new LinkedHashMap<>(); // <!-- authc:所有url都必须认证通过才可以访问; anon:所有url都都可以匿名访问--> filterChainDefinitionMap.put("/webjars/**", "anon"); filterChainDefinitionMap.put("/login", "anon"); filterChainDefinitionMap.put("/", "anon"); filterChainDefinitionMap.put("/front/**", "anon"); filterChainDefinitionMap.put("/api/**", "anon"); filterChainDefinitionMap.put("/admin/**", "authc"); filterChainDefinitionMap.put("/user/**", "authc"); //主要这行代码必须放在所有权限设置的最后,不然会导致所有 url 都被拦截 剩余的都需要认证 filterChainDefinitionMap.put("/**", "authc"); shiroFilterFactoryBean.setFilterChainDefinitionMap(filterChainDefinitionMap); return shiroFilterFactoryBean; } @Bean public SecurityManager securityManager() { DefaultWebSecurityManager defaultSecurityManager = new DefaultWebSecurityManager(); defaultSecurityManager.setRealm(customRealm()); return defaultSecurityManager; } @Bean public CustomRealm customRealm() { CustomRealm customRealm = new CustomRealm(); return customRealm; } }2.1.1 shiroFilter方法shiro的过滤器,可以设置登录页面(setLoginUrl)、权限不足跳转页面(setUnauthorizedUrl)、具体某些页面的权限控制或者身份认证。注意:这里是需要设置SecurityManager(setSecurityManager)。默认的过滤器还有:anno、authc、authcBasic、logout、noSessionCreation、perms、port、rest、roles、ssl、user过滤器。具体的大家可以查看package org.apache.shiro.web.filter.mgt.DefaultFilter。这个类,常用的也就authc、anno。2.1.2 securityManager 方法public interface SecurityManager extends Authenticator, Authorizer, SessionManager { //登录方法 Subject login(Subject subject, AuthenticationToken authenticationToken) throws AuthenticationException; //注销方法 void logout(Subject subject); //创建subject Subject createSubject(SubjectContext context); }由于项目是一个web项目,所以我们使用的是DefaultWebSecurityManager ,然后设置自己的Realm。2.1.3 CustomRealm 方法将 customRealm的实例化交给spring去管理,当然这里也可以利用注解的方式去注入 2.2 CustomRealm自定义的CustomRealm继承AuthorizingRealm。并且重写父类中的doGetAuthorizationInfo(权限相关)、doGetAuthenticationInfo(身份认证)这两个方法。import org.apache.shiro.SecurityUtils; import org.apache.shiro.authc.*; import org.apache.shiro.authz.AuthorizationInfo; import org.apache.shiro.authz.SimpleAuthorizationInfo; import org.apache.shiro.realm.AuthorizingRealm; import org.apache.shiro.subject.PrincipalCollection; import java.util.HashSet; import java.util.Set; /** * */ public class CustomRealm extends AuthorizingRealm { /** * 权限相关 * @param principalCollection * @return */ @Override protected AuthorizationInfo doGetAuthorizationInfo(PrincipalCollection principalCollection) { //账户 String username = (String) SecurityUtils.getSubject().getPrincipal(); SimpleAuthorizationInfo info = new SimpleAuthorizationInfo(); //从数据库获取账户权限信息 Set<String> stringSet = new HashSet<>(); stringSet.add("user:show"); stringSet.add("user:admin"); info.setStringPermissions(stringSet); return info; } /** * 身份认证 * 这里可以注入userService,为了方便演示直接写死账户和密码 * 获取即将需要认证的信息 * @param authenticationToken * @return * @throws AuthenticationException */ @Override protected AuthenticationInfo doGetAuthenticationInfo(AuthenticationToken authenticationToken) throws AuthenticationException { System.out.println("-------身份认证方法--------"); String userName = (String) authenticationToken.getPrincipal(); String userPwd = new String((char[]) authenticationToken.getCredentials()); System.out.println(userPwd); //根据用户名从数据库获取密码 String password = "123"; if (userName == null) { throw new AccountException("用户名不正确"); } else if (!userPwd.equals(password )) { throw new AccountException("密码不正确"); } return new SimpleAuthenticationInfo(userName, password,getName()); } } 自定义的Realm类继承AuthorizingRealm类,并且重载doGetAuthorizationInfo和doGetAuthenticationInfo两个方法。doGetAuthorizationInfo: 权限认证,即登录过后,每个身份不一定,对应的所能看的页面也不一样。doGetAuthenticationInfo:身份认证。即登录通过账号和密码验证登陆人的身份信息。 3.实战演练3.1 登陆认证创建LoginControllerimport org.apache.shiro.SecurityUtils; import org.apache.shiro.authc.*; import org.apache.shiro.subject.Subject; import org.springframework.web.bind.annotation.*; @RestController @RequestMapping public class LoginController { @RequestMapping(value = "/login", method = RequestMethod.GET) public String defaultLogin() { return "首页"; } @RequestMapping(value = "/login", method = RequestMethod.POST) public String login(@RequestParam("username") String username, @RequestParam("password") String password) { // 从SecurityUtils里边创建一个 subject Subject subject = SecurityUtils.getSubject(); // 在认证提交前准备 token(令牌) UsernamePasswordToken token = new UsernamePasswordToken(username, password); // 执行认证登陆 try { subject.login(token); } catch (UnknownAccountException uae) { return "未知账户"; } catch (IncorrectCredentialsException ice) { return "密码不正确"; } catch (LockedAccountException lae) { return "账户已锁定"; } catch (ExcessiveAttemptsException eae) { return "用户名或密码错误次数过多"; } catch (AuthenticationException ae) { return "用户名或密码不正确!"; } if (subject.isAuthenticated()) { return "登录成功"; } else { token.clear(); return "登录失败"; } } }测试结果:3.2 权限测试在ShiroConfig添加如下代码,开启注解。@Bean public LifecycleBeanPostProcessor lifecycleBeanPostProcessor() { return new LifecycleBeanPostProcessor(); } /** * * * 开启Shiro的注解(如@RequiresRoles,@RequiresPermissions),需借助SpringAOP扫描使用Shiro注解的类,并在必要时进行安全逻辑验证 * * * 配置以下两个bean(DefaultAdvisorAutoProxyCreator(可选)和AuthorizationAttributeSourceAdvisor)即可实现此功能 * * @return */ @Bean @DependsOn({"lifecycleBeanPostProcessor"}) public DefaultAdvisorAutoProxyCreator advisorAutoProxyCreator() { DefaultAdvisorAutoProxyCreator advisorAutoProxyCreator = new DefaultAdvisorAutoProxyCreator(); advisorAutoProxyCreator.setProxyTargetClass(true); return advisorAutoProxyCreator; } @Bean public AuthorizationAttributeSourceAdvisor authorizationAttributeSourceAdvisor() { AuthorizationAttributeSourceAdvisor authorizationAttributeSourceAdvisor = new AuthorizationAttributeSourceAdvisor(); authorizationAttributeSourceAdvisor.setSecurityManager(securityManager()); return authorizationAttributeSourceAdvisor; }创建UserControllerimport com.shiro.utils.BaseController; import org.apache.shiro.authz.annotation.RequiresPermissions; import org.springframework.web.bind.annotation.RequestMapping; import org.springframework.web.bind.annotation.RestController; @RequestMapping("/user") @RestController public class UserController extends BaseController { @RequiresPermissions("user:list") @RequestMapping("/show") public String showUser() { return "张三信息"; } }再创建 BaseController,UserController继承BaseController,用于捕获没有权限时的异常import org.apache.shiro.authz.AuthorizationException; import org.apache.shiro.authz.UnauthorizedException; import org.springframework.web.bind.annotation.ExceptionHandler; import java.util.HashMap; import java.util.Map; public class BaseController { /** * 捕获没有权限时的异常 * @return */ @ExceptionHandler({ UnauthorizedException.class, AuthorizationException.class }) public Map<String, Object> authorizationException(){ Map<String, Object> map = new HashMap<String, Object>(); System.out.println("没有权限"); map.put("success", true); map.put("msg", "当前用户没有此权限"); return map; } } 运行测试,先执行 http://127.0.0.1:8080/login,再执行http://127.0.0.1:8080/user/show:方法上是 @RequiresPermissions("user:list"),之前在customRealm只添加了两个所以没有权限现在把方法上的改为@RequiresPermissions("user:show")测试现在就有权限访问数据啦4.项目源码项目地址 下篇介绍《Spring Boot 整合Shiro(二)加密登录与密码加盐处理》
-
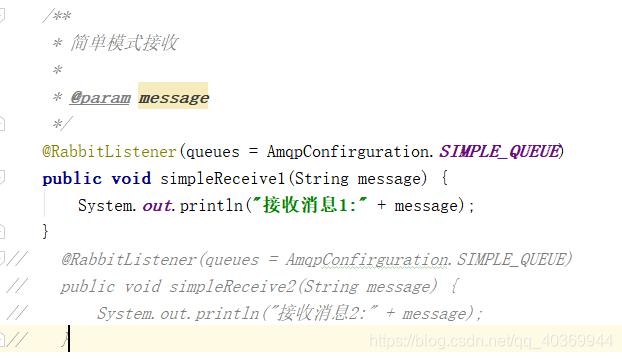
Spring Boot 整合 RabbitMQ(附源码) 一、前言RabbitMQ 的模式介绍可以看看笔者写的这篇文章《RabbitMQ 工作模式介绍》二、整合 RabbitMQ2.1 添加依赖 <dependency> <groupId>org.springframework.boot</groupId> <artifactId>spring-boot-starter-amqp</artifactId> </dependency>2.2 添加配置spring.rabbitmq.host=192.168.2.101 spring.rabbitmq.port=5672 spring.rabbitmq.username=admin spring.rabbitmq.password=admin2.3 配置类AmqpConfirguration.javaimport org.springframework.amqp.core.*; import org.springframework.amqp.rabbit.connection.CachingConnectionFactory; import org.springframework.amqp.rabbit.connection.ConnectionFactory; import org.springframework.amqp.rabbit.core.RabbitTemplate; import org.springframework.beans.factory.annotation.Value; import org.springframework.beans.factory.config.ConfigurableBeanFactory; import org.springframework.context.annotation.Bean; import org.springframework.context.annotation.Configuration; import org.springframework.context.annotation.Scope; import java.util.logging.Logger; /** * 配置类: */ @Configuration public class AmqpConfirguration { private final Logger logger = Logger.getLogger(this.getClass().getName()); @Value("${spring.rabbitmq.host}") private String host; @Value("${spring.rabbitmq.port}") private int port; @Value("${spring.rabbitmq.username}") private String username; @Value("${spring.rabbitmq.password}") private String password; @Bean public ConnectionFactory connectionFactory() { CachingConnectionFactory connectionFactory = new CachingConnectionFactory(host,port); connectionFactory.setUsername(username); connectionFactory.setPassword(password); connectionFactory.setVirtualHost("/"); connectionFactory.setPublisherConfirms(true); return connectionFactory; } @Bean @Scope(ConfigurableBeanFactory.SCOPE_PROTOTYPE) //必须是prototype类型 public RabbitTemplate rabbitTemplate() { RabbitTemplate template = new RabbitTemplate(connectionFactory()); return template; } //=============简单、工作队列模式=============== public static final String SIMPLE_QUEUE = "simple_queue"; @Bean public Queue queue() { return new Queue(SIMPLE_QUEUE, true); } //===============发布/订阅模式============ public static final String PS_QUEUE_1 = "ps_queue_1"; public static final String PS_QUEUE_2 = "ps_queue_2"; public static final String FANOUT_EXCHANGE = "fanout_exchange"; @Bean public Queue psQueue1() { return new Queue(PS_QUEUE_1, true); } @Bean public Queue psQueue2() { return new Queue(PS_QUEUE_2, true); } @Bean public FanoutExchange fanoutExchange() { return new FanoutExchange(FANOUT_EXCHANGE); } @Bean public Binding fanoutBinding1() { return BindingBuilder.bind(psQueue1()).to(fanoutExchange()); } @Bean public Binding fanoutBinding2() { return BindingBuilder.bind(psQueue2()).to(fanoutExchange()); } //===============路由模式============ public static final String ROUTING_QUEUE_1 = "routing_queue_1"; public static final String ROUTING_QUEUE_2 = "routing_queue_2"; public static final String DIRECT_EXCHANGE = "direct_exchange"; @Bean public Queue routingQueue1() { return new Queue(ROUTING_QUEUE_1, true); } @Bean public Queue routingQueue2() { return new Queue(ROUTING_QUEUE_2, true); } @Bean public DirectExchange directExchange() { return new DirectExchange(DIRECT_EXCHANGE); } @Bean public Binding directBinding1() { return BindingBuilder.bind(routingQueue1()).to(directExchange()).with("user"); } @Bean public Binding directBinding2() { return BindingBuilder.bind(routingQueue2()).to(directExchange()).with("order"); } //===============主题模式============ public static final String TOPIC_QUEUE_1 = "topic_queue_1"; public static final String TOPIC_QUEUE_2 = "topic_queue_2"; public static final String TOPIC_QUEUE_3 = "topic_queue_3"; public static final String TOPIC_EXCHANGE = "topic_exchange"; @Bean public Queue topicQueue1() { return new Queue(TOPIC_QUEUE_1, true); } @Bean public Queue topicQueue2() { return new Queue(TOPIC_QUEUE_2, true); } @Bean public Queue topicQueue3() { return new Queue(TOPIC_QUEUE_3, true); } @Bean public TopicExchange topicExchange() { return new TopicExchange(TOPIC_EXCHANGE); } @Bean public Binding topicBinding1() { return BindingBuilder.bind(topicQueue1()).to(topicExchange()).with("user.add"); } @Bean public Binding topicBinding2() { return BindingBuilder.bind(topicQueue2()).to(topicExchange()).with("user.#"); } @Bean public Binding topicBinding3() { return BindingBuilder.bind(topicQueue1()).to(topicExchange()).with("test.#"); } }2.4 消息生产者AmqpSender.javaimport org.springframework.amqp.core.AmqpTemplate; import org.springframework.beans.factory.annotation.Autowired; import org.springframework.stereotype.Component; /** * 消息生产者 */ @Component public class AmqpSender { @Autowired private AmqpTemplate amqpTemplate; /** * 简单模式发送 * * @param message */ public void simpleSend(String message) { this.amqpTemplate.convertAndSend(AmqpConfirguration.SIMPLE_QUEUE, message); } /** * 发布/订阅模式发送 * * @param message */ public void psSend(String message) { this.amqpTemplate.convertAndSend(AmqpConfirguration.FANOUT_EXCHANGE, "", message); } /** * 路由模式发送 * * @param message */ public void routingSend(String routingKey, String message) { this.amqpTemplate.convertAndSend(AmqpConfirguration.DIRECT_EXCHANGE, routingKey, message); } /** * 主题模式发送 * * @param routingKey * @param message */ public void topicSend(String routingKey, String message) { this.amqpTemplate.convertAndSend(AmqpConfirguration.TOPIC_EXCHANGE, routingKey, message); } }2.5 消息消费者AmqpReceiver.javaimport org.springframework.amqp.rabbit.annotation.RabbitListener; import org.springframework.stereotype.Component; /** * 消息消费者 */ @Component public class AmqpReceiver { //使@RabbitListener 注解监听消息。 /** * 简单模式接收 * * @param message */ @RabbitListener(queues = AmqpConfirguration.SIMPLE_QUEUE) public void simpleReceive1(String message) { System.out.println("接收消息1:" + message); } @RabbitListener(queues = AmqpConfirguration.SIMPLE_QUEUE) public void simpleReceive2(String message) { System.out.println("接收消息2:" + message); } /** * 发布/订阅模式接收 * * @param message */ @RabbitListener(queues = AmqpConfirguration.PS_QUEUE_1) public void psReceive1(String message) { System.out.println(AmqpConfirguration.PS_QUEUE_1 + "接收消息:" + message); } @RabbitListener(queues = AmqpConfirguration.PS_QUEUE_2) public void psReceive2(String message) { System.out.println(AmqpConfirguration.PS_QUEUE_2 + "接收消息:" + message); } /** * 路由模式接收 * * @param message */ @RabbitListener(queues = AmqpConfirguration.ROUTING_QUEUE_1) public void routingReceive1(String message) { System.out.println(AmqpConfirguration.ROUTING_QUEUE_1 + "接收消息:" + message); } @RabbitListener(queues = AmqpConfirguration.ROUTING_QUEUE_2) public void routingReceive2(String message) { System.out.println(AmqpConfirguration.ROUTING_QUEUE_2 + "接收消息:" + message); } /** * 主题模式接收 * * @param message */ @RabbitListener(queues = AmqpConfirguration.TOPIC_QUEUE_1) public void topicReceive1(String message) { System.out.println(AmqpConfirguration.TOPIC_QUEUE_1 + "接收消息:" + message); } @RabbitListener(queues = AmqpConfirguration.TOPIC_QUEUE_2) public void topicReceive2(String message) { System.out.println(AmqpConfirguration.TOPIC_QUEUE_2 + "接收消息:" + message); } @RabbitListener(queues = AmqpConfirguration.TOPIC_QUEUE_3) public void topicReceive3(String message) { System.out.println(AmqpConfirguration.TOPIC_QUEUE_3 + "接收消息:" + message); } }2.6 测试类@RunWith(SpringRunner.class) @SpringBootTest public class RabbitmqApplicationTests { @Autowired private AmqpSender sender; @Test public void testSimpleSend() { //简单模式发送 for (int i = 1; i < 6; i++) { this.sender.simpleSend("test simpleSend " + i); } } @Test public void testPsSend() { //发布/订阅模式发送 for (int i = 1; i < 6; i++) { this.sender.psSend("test psSend " + i); } } @Test public void testRoutingSend() { //路由模式发送 for (int i = 1; i < 6; i++) { this.sender.routingSend("order", "test routingSend " + i); } } @Test public void testTopicSend() { //主题模式发送 for (int i = 1; i < 6; i++) { this.sender.topicSend("user.add", "test topicSend " + i); } } } 三、实战演练 3.1 简单模式与工作队列模式一个消息消费者:结果:两个消息消费者:结果:由两个消息消费者平均消费消息3.2 发布/订阅模式两个消息消费者:结果:所有消息消费者都能收到所有信息 3.3路由模式在AmqpConfirguration定义了“user”和"order",在路由上绑定了routingKey为“user”与“order”两个队列两个消息消费者: 测试:routingKey为“order” 可以看到只有routing_queue_2收到了消息,routing_queue_2的routingKey为“order”3.4 主题模式在路由上绑定了三个队列,routingKey分别为“user.add”、“user.#”、“test.#”3个消息消费者测试:routingKey为“user.add”可以发现topic_queue_1和topic_queue_2都接收到了消息,而topic_queue_3没有。因为主题模式中routingKey里的 符号 “#” 匹配一个或多个词,符号“*”匹配不多不少一个词。相当于模糊匹配,而topic_queue_3匹配不上三、项目源码源码下载
-
Spring Boot 整合 Shiro(三)Kaptcha验证码 附源码 前言本文是根据上篇《Spring Boot 整合Shiro(二)加密登录与密码加盐处理》进行修改,如有不明白的转上篇文章了解。1.导入依赖 <!-- https://mvnrepository.com/artifact/com.github.penggle/kaptcha --> <dependency> <groupId>com.github.penggle</groupId> <artifactId>kaptcha</artifactId> <version>2.3.2</version> </dependency> 2.配置创建KaptchaConfig.javaimport com.google.code.kaptcha.impl.DefaultKaptcha; import com.google.code.kaptcha.util.Config; import org.springframework.context.annotation.Bean; import org.springframework.stereotype.Component; import java.util.Properties; @Component public class KaptchaConfig { @Bean public DefaultKaptcha getDefaultKaptcha() { com.google.code.kaptcha.impl.DefaultKaptcha defaultKaptcha = new com.google.code.kaptcha.impl.DefaultKaptcha(); Properties properties = new Properties(); // 图片边框 properties.setProperty("kaptcha.border", "yes"); // 边框颜色 properties.setProperty("kaptcha.border.color", "105,179,90"); // 字体颜色 properties.setProperty("kaptcha.textproducer.font.color", "red"); // 图片宽 properties.setProperty("kaptcha.image.width", "110"); // 图片高 properties.setProperty("kaptcha.image.height", "40"); // 字体大小 properties.setProperty("kaptcha.textproducer.font.size", "30"); // session key properties.setProperty("kaptcha.session.key", "code"); // 验证码长度 properties.setProperty("kaptcha.textproducer.char.length", "4"); // 字体 properties.setProperty("kaptcha.textproducer.font.names", "宋体,楷体,微软雅黑"); //可以设置很多属性,具体看com.google.code.kaptcha.Constants // kaptcha.border 是否有边框 默认为true 我们可以自己设置yes,no // kaptcha.border.color 边框颜色 默认为Color.BLACK // kaptcha.border.thickness 边框粗细度 默认为1 // kaptcha.producer.impl 验证码生成器 默认为DefaultKaptcha // kaptcha.textproducer.impl 验证码文本生成器 默认为DefaultTextCreator // kaptcha.textproducer.char.string 验证码文本字符内容范围 默认为abcde2345678gfynmnpwx // kaptcha.textproducer.char.length 验证码文本字符长度 默认为5 // kaptcha.textproducer.font.names 验证码文本字体样式 默认为new Font("Arial", 1, fontSize), new Font("Courier", 1, fontSize) // kaptcha.textproducer.font.size 验证码文本字符大小 默认为40 // kaptcha.textproducer.font.color 验证码文本字符颜色 默认为Color.BLACK // kaptcha.textproducer.char.space 验证码文本字符间距 默认为2 // kaptcha.noise.impl 验证码噪点生成对象 默认为DefaultNoise // kaptcha.noise.color 验证码噪点颜色 默认为Color.BLACK // kaptcha.obscurificator.impl 验证码样式引擎 默认为WaterRipple // kaptcha.word.impl 验证码文本字符渲染 默认为DefaultWordRenderer // kaptcha.background.impl 验证码背景生成器 默认为DefaultBackground // kaptcha.background.clear.from 验证码背景颜色渐进 默认为Color.LIGHT_GRAY // kaptcha.background.clear.to 验证码背景颜色渐进 默认为Color.WHITE // kaptcha.image.width 验证码图片宽度 默认为200 // kaptcha.image.height 验证码图片高度 默认为50 Config config = new Config(properties); defaultKaptcha.setConfig(config); return defaultKaptcha; } } 3.验证码生成/验证import java.awt.image.BufferedImage; import java.io.ByteArrayOutputStream; import javax.imageio.ImageIO; import javax.servlet.ServletOutputStream; import javax.servlet.http.HttpServletRequest; import javax.servlet.http.HttpServletResponse; import org.springframework.beans.factory.annotation.Autowired; import org.springframework.stereotype.Controller; import org.springframework.web.bind.annotation.RequestMapping; import org.springframework.web.servlet.ModelAndView; import com.google.code.kaptcha.impl.DefaultKaptcha; @Controller @RequestMapping(value ="/kaptcha" ) public class KaptchaController { /** * 1、验证码工具 */ @Autowired DefaultKaptcha defaultKaptcha; /** * 2、生成验证码 * @param httpServletRequest * @param httpServletResponse * @throws Exception */ @RequestMapping("/defaultKaptcha") public void defaultKaptcha(HttpServletRequest httpServletRequest, HttpServletResponse httpServletResponse) throws Exception { byte[] captchaChallengeAsJpeg = null; ByteArrayOutputStream jpegOutputStream = new ByteArrayOutputStream(); try { // 生产验证码字符串并保存到session中 String createText = defaultKaptcha.createText(); httpServletRequest.getSession().setAttribute("rightCode", createText); // 使用生产的验证码字符串返回一个BufferedImage对象并转为byte写入到byte数组中 BufferedImage challenge = defaultKaptcha.createImage(createText); ImageIO.write(challenge, "jpg", jpegOutputStream); } catch (IllegalArgumentException e) { httpServletResponse.sendError(HttpServletResponse.SC_NOT_FOUND); return; } // 定义response输出类型为image/jpeg类型,使用response输出流输出图片的byte数组 captchaChallengeAsJpeg = jpegOutputStream.toByteArray(); httpServletResponse.setHeader("Cache-Control", "no-store"); httpServletResponse.setHeader("Pragma", "no-cache"); httpServletResponse.setDateHeader("Expires", 0); httpServletResponse.setContentType("image/jpeg"); ServletOutputStream responseOutputStream = httpServletResponse.getOutputStream(); responseOutputStream.write(captchaChallengeAsJpeg); responseOutputStream.flush(); responseOutputStream.close(); } /** * 3、校对验证码 * @param httpServletRequest * @param httpServletResponse * @return */ @RequestMapping("/imgvrifyControllerDefaultKaptcha") public ModelAndView imgvrifyControllerDefaultKaptcha(HttpServletRequest httpServletRequest, HttpServletResponse httpServletResponse) { ModelAndView andView = new ModelAndView(); String rightCode = (String) httpServletRequest.getSession().getAttribute("rightCode"); String tryCode = httpServletRequest.getParameter("tryCode"); System.out.println("rightCode:"+rightCode+" ———— tryCode:"+tryCode); if (!rightCode.equals(tryCode)) { andView.addObject("info", "错误的验证码"); andView.setViewName("/login"); } else { andView.addObject("info", "登录成功"); andView.setViewName("success"); } return andView; } } 4.修改ShiroConfig开放相应的验证码路径,避免拦截@Bean(name = "shiroFilter") public ShiroFilterFactoryBean shiroFilter(SecurityManager securityManager) { ShiroFilterFactoryBean shiroFilterFactoryBean = new ShiroFilterFactoryBean(); // Shiro的核心安全接口,这个属性是必须的 shiroFilterFactoryBean.setSecurityManager(securityManager); // 身份认证失败,则跳转到登录页面的配置 shiroFilterFactoryBean.setLoginUrl("/login"); // 权限认证失败,则跳转到指定页面 shiroFilterFactoryBean.setUnauthorizedUrl("/notRole"); Map<String, String> filterChainDefinitionMap = new LinkedHashMap<>(); // <!-- authc:所有url都必须认证通过才可以访问; anon:所有url都都可以匿名访问--> filterChainDefinitionMap.put("/webjars/**", "anon"); filterChainDefinitionMap.put("/login", "anon"); filterChainDefinitionMap.put("/loginOut", "anon"); filterChainDefinitionMap.put("/", "anon"); filterChainDefinitionMap.put("/front/**", "anon"); filterChainDefinitionMap.put("/api/**", "anon"); filterChainDefinitionMap.put("/kaptcha/**", "anon"); filterChainDefinitionMap.put("/success/**", "anon"); filterChainDefinitionMap.put("/admin/**", "authc"); filterChainDefinitionMap.put("/user/**", "authc"); //主要这行代码必须放在所有权限设置的最后,不然会导致所有 url 都被拦截 剩余的都需要认证 filterChainDefinitionMap.put("/**", "authc"); shiroFilterFactoryBean.setFilterChainDefinitionMap(filterChainDefinitionMap); return shiroFilterFactoryBean; }5.修改LoginController@Controller @RequestMapping public class LoginController { private Logger logger = Logger.getLogger(this.getClass().getName()); /** * 界面 * @return */ @RequestMapping(value = "/login", method = RequestMethod.GET) public String defaultLogin() { return "login"; } /** * 退出 * @return */ @RequestMapping(value = "/loginOut", method = RequestMethod.GET) public String loginOut() { Subject subject = SecurityUtils.getSubject(); subject.logout(); return "login"; } /** * 登录提交 * @param username * @param tryCode * @param password * @param redirectAttributes * @return */ @RequestMapping(value = "/login", method = RequestMethod.POST) public String login(@RequestParam("username") String username, @RequestParam("tryCode") String tryCode, @RequestParam("password") String password, RedirectAttributes redirectAttributes) { //判断验证码 if(StringUtils.isBlank(tryCode)){ logger.info("验证码为空了!"); redirectAttributes.addFlashAttribute("message", "验证码不能为空!"); return "redirect:login"; } Session session = SecurityUtils.getSubject().getSession(); String code = (String) session.getAttribute("rightCode"); System.out.println(code+"*************"+tryCode); if(!tryCode.equalsIgnoreCase(code)){ logger.info("验证码错误!"); redirectAttributes.addFlashAttribute("message", "验证码错误!"); return "redirect:login"; } // 从SecurityUtils里边创建一个 subject Subject subject = SecurityUtils.getSubject(); // 在认证提交前准备 token(令牌) UsernamePasswordToken token = new UsernamePasswordToken(username, password); String attributeValue = null; // 执行认证登陆 try { subject.login(token); } catch (UnknownAccountException uae) { attributeValue="未知账户!"; } catch (IncorrectCredentialsException ice) { attributeValue="密码不正确!"; } catch (LockedAccountException lae) { attributeValue= "账户已锁定"; } catch (ExcessiveAttemptsException eae) { attributeValue= "用户名或密码错误次数过多"; } catch (AuthenticationException ae) { attributeValue= "用户名或密码不正确!"; }finally { redirectAttributes.addFlashAttribute("message", attributeValue); if (subject.isAuthenticated()) { return "success"; } else { token.clear(); return "redirect:login"; } } } }6.界面6.1整合thymeleaf模板添加依赖;<!--thymeleaf--> <dependency> <groupId>org.springframework.boot</groupId> <artifactId>spring-boot-starter-thymeleaf</artifactId> </dependency>编辑application.ymlserver: port: 80 servlet: context-path: / #thymeleaf模板 spring: thymeleaf: cache: true prefix: classpath: /templates/ suffix: .html mode: HTML5 encoding: UTF-8 servlet: content-type: text/html 6.2创建login.html<!DOCTYPE html> <!-- thymeleaf 提示功能 --> <html xmlns:th="http://www.thymeleaf.org" xmlns="http://www.w3.org/1999/html"> <head lang="en"> <meta charset="UTF-8"></meta> <title>验证码</title> </head> <style type="text/css"> body { padding: 10px } </style> <body> <!-- 提示 --> <h3 th:text="${message}"></h3> <div> <!-- 后面添加参数起到清除缓存作用 --> <img alt="验证码" onclick="this.src='/kaptcha/defaultKaptcha?d='+new Date()*1" src="/kaptcha/defaultKaptcha" /> </div> <form action="/login" method="post"> 账户:<input type="text" name="username" /></br> 密码:<input type="text" name="password" /></br> 验证码:<input type="text" name="tryCode" /> <input type="submit" value="提交" ></input> </form> </body> </html> success.html<!DOCTYPE html> <html> <head> <meta charset="UTF-8"></meta> <title>成功</title> </head> <body> <h1>登录成功</h1> <a href="/loginOut">退出</a> </body> </html> 7. 实战演练 8.项目源码《源码下载》下篇介绍Spring Boot 整合 Shiro(四)thymeleaf模板权限控制 附源码